
Last Updated: November 1, 2026
Quick Summary
Stop loft condensation by keeping the cold roof space ventilated while sealing the warm ceiling below. Clear every eaves gap, fit eaves baffles to hold insulation back, and keep a 50mm air space between insulation and the roof covering. Reducing moisture at source with extractor fans also helps.
- Blocked eaves are one of the most common installation errors causing loft condensation.
- Fit eaves baffles to hold insulation back from the airflow path at the eaves.
- Keep a 50mm air space between the insulation and the roof covering.
- Wet insulation quilt loses most of its thermal efficiency, so check the eaves first.
- Run extractor fans in bathrooms and kitchens during and after use to cut moisture.
Table of Contents
- Why Loft Condensation Appears After Insulation Goes In
- Signs of Condensation in a Loft You Should Not Ignore
- How to Improve Loft Ventilation Without Losing Heat
- Loft Insulation Installation Mistakes That Trap Moisture
- Managing Moisture Sources Below the Loft Hatch
- Retrofitting Ventilation in Older Homes and Monitoring the Result
- Book a Loft and Heating Inspection With a Gas Safe Engineer
- Frequently Asked Questions
Why Loft Condensation Appears After Insulation Goes In
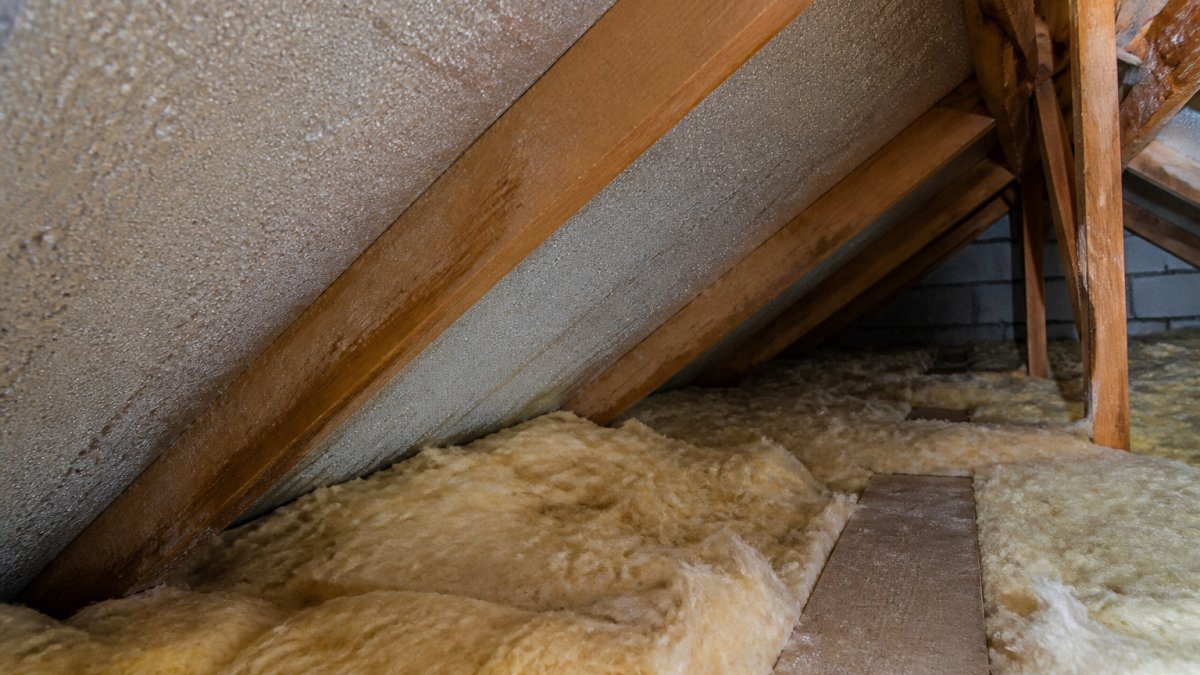
Loft condensation is moisture that forms when warm, damp air meets a cold surface in the roof space. It often shows up right after insulation goes in, which makes homeowners assume the insulation is at fault.
The Energy Saving Trust guidance on roof and loft insulation is clear that insulation and ventilation must work together. Seal one without the other and moisture has nowhere to go.
The Dew Point and Why Cold Roof Spaces Sweat
Warm air holds more moisture than cold air. When that air cools to its dew point, the vapour turns back into water. In an unheated loft, the underside of the roof covering is often the coldest surface around. Any moist air that reaches it will condense there, then drip onto your new insulation.
Air Leakage From the Living Space
Most loft moisture doesn’t start in the loft. It rises from kitchens, bathrooms and gaps around ceiling fittings. Insulation slows heat loss, so the loft stays colder for longer, and that leaking vapour condenses more readily. Blocked eaves make it worse. According to Home Energy Save UK guidance on loft condensation, blocking eaves with insulation is one of the most common installation errors we see.
Signs of Condensation in a Loft You Should Not Ignore
The clearest signs of condensation in a loft are damp patches on the roof timbers, black mould on rafters, and water droplets on the underside of the roof felt.
Watch out: wet insulation quilt loses most of its thermal efficiency, so the problem compounds. Check for these warning signs:
- Damp or dark staining on rafters and roof felt
- Black mould spots on timber or stored boxes
- A musty smell when you open the hatch
How to Improve Loft Ventilation Without Losing Heat
You improve loft ventilation by letting air move freely at the eaves and ridge while keeping the insulated ceiling sealed. The trick is to ventilate the cold roof space, not the warm room below.
Follow these steps:
- Check that every eaves gap is clear and not stuffed with insulation.
- Fit eaves baffles to hold insulation back from the airflow path.
- Confirm soffit vents and air bricks are open and unobstructed.
- Add ridge vents if the roof has no other high-level outlet.
- Keep a 50mm air space between insulation and the roof covering, as Sussex Damp Experts advise.
Eaves, Soffit Vents and Air Bricks
Eaves gaps, soffit vents and air bricks form the intake side of the system. Air enters low and leaves high. If any of these are blocked, the whole roof space goes still.
Ridge Vents and Vapour Barriers
Ridge vents let warm, moist air escape at the top. Carbon Coop guidance on roof ventilation recommends them for passive moisture removal. A vapour barrier on the warm side of the ceiling adds a second line of defence.
Loft Insulation Installation Mistakes That Trap Moisture
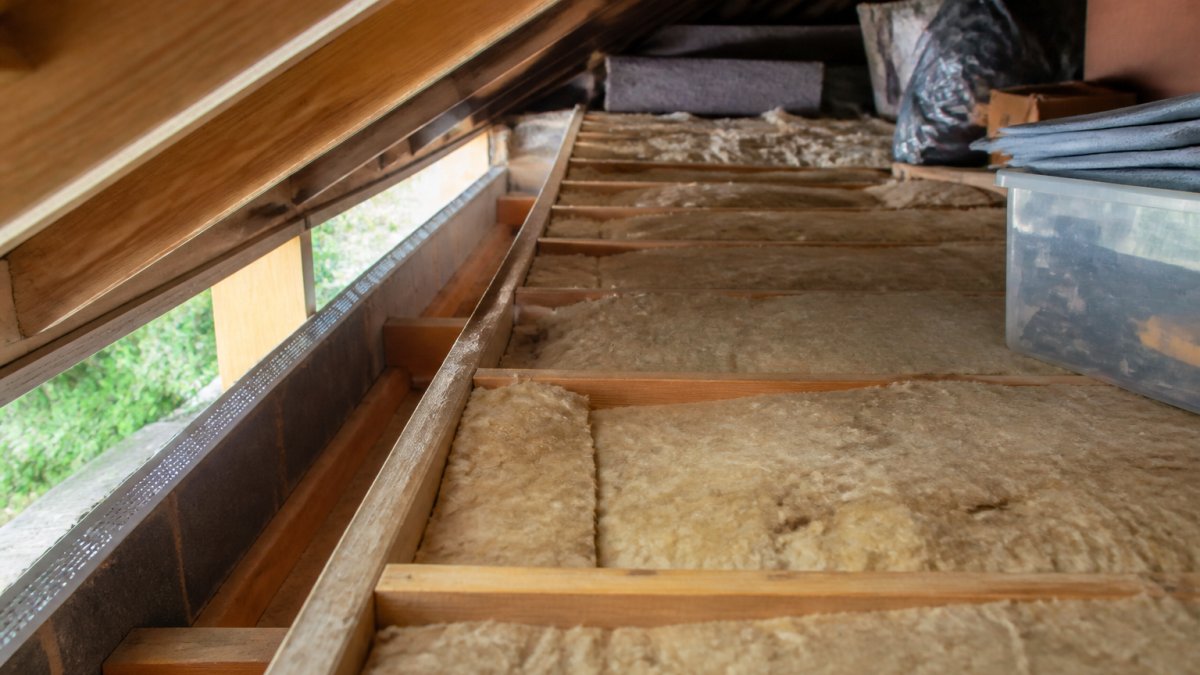
Blocking the eaves is a common installation mistake. Others include compressing the quilt, leaving gaps around pipes, and laying insulation over vents.
Why Each Mistake Matters
- Pushing insulation into the eaves. Mineral wool is vapour-permeable, so moisture can pass through it, but packed wool still blocks the airflow path. The eaves gap is the intake for the whole cold roof space; stuff it and the roof goes still, so vapour that reaches the cold underside of the felt has no route out.
- Squashing the quilt. Compressing mineral wool reduces its thermal resistance, so the ceiling below stays warmer and more heat (carrying moisture) reaches the cold loft. The quilt also becomes denser and less able to dry out if it does get damp.
- Skipping eaves baffles on a tight roof pitch. A baffle holds the insulation back from the airflow path while letting air pass over the top. On shallow pitches there is little room between the joist top and the roof covering, so without a baffle the installer either blocks the gap or leaves the insulation short and underperforming.
Mineral Wool vs. PIR Boards
The material changes the risk. Mineral wool is vapour-open: moisture passes through it and can dry into the loft, so it tolerates a little damp better but relies on airflow to dry out. PIR boards are closed-cell and foil-faced, so they act as their own vapour control layer when fitted tight and taped. That is an advantage in a warm-roof build-up, but in a cold loft it means any gap at the edges, around pipes or at the wall plate becomes a path for moist air to bypass the board and condense on the cold side.
Wet insulation quilt loses most of its thermal efficiency, so a single blocked eaves gap can undo the savings from the whole installation. Check the eaves before you check anything else.
If you’re redoing a poor job, our guide on how to improve home insulation efficiency walks through getting the depth and airflow right.
Managing Moisture Sources Below the Loft Hatch
Reducing moisture at source is the most reliable fix. Every shower, kettle and drying rack adds vapour to the air, and that vapour rises. Cut it at the source and the loft has far less to deal with.
Practical steps:
- Run extractor fans in bathrooms and kitchens during and after use
- Keep trickle vents open on windows
- Dry laundry outdoors or in a vented dryer
A hygrometer helps you track indoor humidity, and our wider guide on home energy efficiency covers moisture control room by room. For draughts feeding the problem, see ways to stop draughts in older homes.
Retrofitting Ventilation in Older Homes and Monitoring the Result
Older homes often have no ridge vents and narrow eaves, so retrofitting takes more thought. The good news is that it can be done without a full re-roof, but the right approach depends on the roof structure you actually have rather than a generic checklist.
Matching the Fix to the Roof Type
- Victorian and Edwardian pitched roofs with slate or clay tiles. These usually have a breather felt or, in older examples, no felt at all. Tile vents are the least invasive high-level outlet: a vent tile replaces one tile and connects to the loft with a short duct. Where the ridge is sound, a dry-fix ridge vent can be added without stripping the roof.
- Post-war hipped roofs with bituminous felt. The felt is often sagging and non-permeable, so the loft cannot dry upwards. Replace failed felt with a vapour-permeable membrane when the roof is next re-covered, and in the meantime add eaves vents through the soffit and a couple of tile vents near the ridge.
- Solid-wall and gable-end properties. Air bricks in the gable serve as intake; keep them clear and consider adding a high-level outlet on the opposite side so air crosses the loft rather than short-circuiting.
Material Choices That Suit Older Roofs
A vapour-permeable membrane is the default replacement for failing felt because it lets moisture pass while keeping wind and rain out. Where the old felt is intact but non-permeable, adding high-level vents is usually cheaper than re-covering the roof. Vapour control layers belong on the warm side of the ceiling, never on the cold side of the insulation, and any gaps around pipes, downlights and the loft hatch need sealing before you add ventilation, otherwise you are ventilating air that is already moist.
Monitoring With Real Thresholds
A cheap hygrometer is enough to track loft humidity, but read it against a target rather than a vague sense of “damp”. Loft relative humidity should be kept under control, and sustained readings that climb after a shower or laundry day suggest a moisture path that ventilation alone may not fix. Log readings monthly for the first few months after insulating, and again at the start of each heating season when the temperature difference between the living space and the loft is greatest.
Place the hygrometer away from the loft hatch and off the floor, at roughly rafter mid-height, so it reads the air in the cold roof space rather than the draught coming up the hatch.
The EEVblog discussion of vapour control and airtightness highlights how important the vapour barrier’s position is. Get it on the warm side and moisture stays out of the cold space.
Post-Insulation Maintenance Checklist
A simple seasonal schedule keeps things on track:
| Check | How Often | Why It Matters |
|---|---|---|
| Inspect eaves for blockages | Every 6 months, and before winter | Keeps intake airflow open |
| Test extractor fans | Every 3 months | Removes moisture at source |
| Read loft hygrometer | Monthly | Spots rising humidity early |
| Check for damp or mould | Every 6 months | Catches problems before rot |
| Confirm vents are clear | Annually, before the heating season | Prevents silent blockage |
| Check loft hatch seal | Annually | Stops warm air bypassing the insulation |
Energy Saving Trust’s insulation advice recommends checking ventilation whenever insulation is topped up.
Book a Loft and Heating Inspection With a Gas Safe Engineer
A damp loft and a struggling heating system often share a cause: poor airflow and heat loss working against each other. If your boiler is short-cycling or your bills are climbing, it’s worth a proper look.
Major Heat’s Gas Safe registered engineers can assist with heating system enquiries. Free quotes are available, so you can see the cost before work begins. You can also arrange heating system support with our team.
Frequently Asked Questions
Is condensation in a loft normal in winter?
A little condensation on cold mornings is common, but standing water, sodden insulation or black mould is not normal and points to a ventilation or air leakage problem. Cold roof spaces sit close to the dew point in winter, so warm moist air reaching them will condense on the underside of the roof covering. If you see repeated damp patches, check that eaves gaps are clear and that no insulation is blocking airflow before assuming the roof is at fault.
Can loft insulation cause condensation?
The insulation material itself does not create water. Loft condensation causes are usually poor ventilation and warm air leaking from the rooms below. Problems start when insulation is pushed tight into the eaves, blocking the 50mm air space needed under the roof covering, or when gaps around pipes and loft hatches let moist air through. Keep ventilation gaps open and seal air leaks, and the insulation will do its job without trapping moisture.
Should you ventilate a loft after adding insulation?
Yes. Adding insulation makes the roof space colder, which raises the chance of vapour condensing on roof timbers. Keep eaves and soffit vents clear, fit ridge vents where the roof allows, and consider a vapour barrier on the warm side of the insulation. A cheap hygrometer left in the loft will show whether humidity stays under control, and it gives you evidence to act on before damp spreads into ceilings.
When should you get professional help for damp or condensation in a loft?
Call in a professional if you find sodden insulation, mould on rafters, water staining on ceilings or a persistent musty smell after you have cleared the vents. These signs can point to interstitial condensation or a roof defect that needs proper diagnosis. A Gas Safe registered engineer can also check that extractor fans and heating are working correctly, since both affect how much moisture travels up into the roof space.
Sorting condensation now protects your insulation, your timbers and your heating bills. Get started with Major Heat and book a Gas Safe inspection that puts airflow and efficiency right.
